LiveSchools365 Role Training Kit — School Admin
Trainer-grade · 2026-09-23 · ~60 min · https://liveschools365.com
USER TRAINING (not QA smoke).
1. Purpose
Make the school ready to operate: identity, master data, users, fees, and teaching coverage.
Business scenario
You are preparing a new campus for the autumn term. Leadership expects the school name/logo, class structure, teacher logins, fee readiness, and timetable coverage to be correct before students arrive on Monday.
Learning outcomes
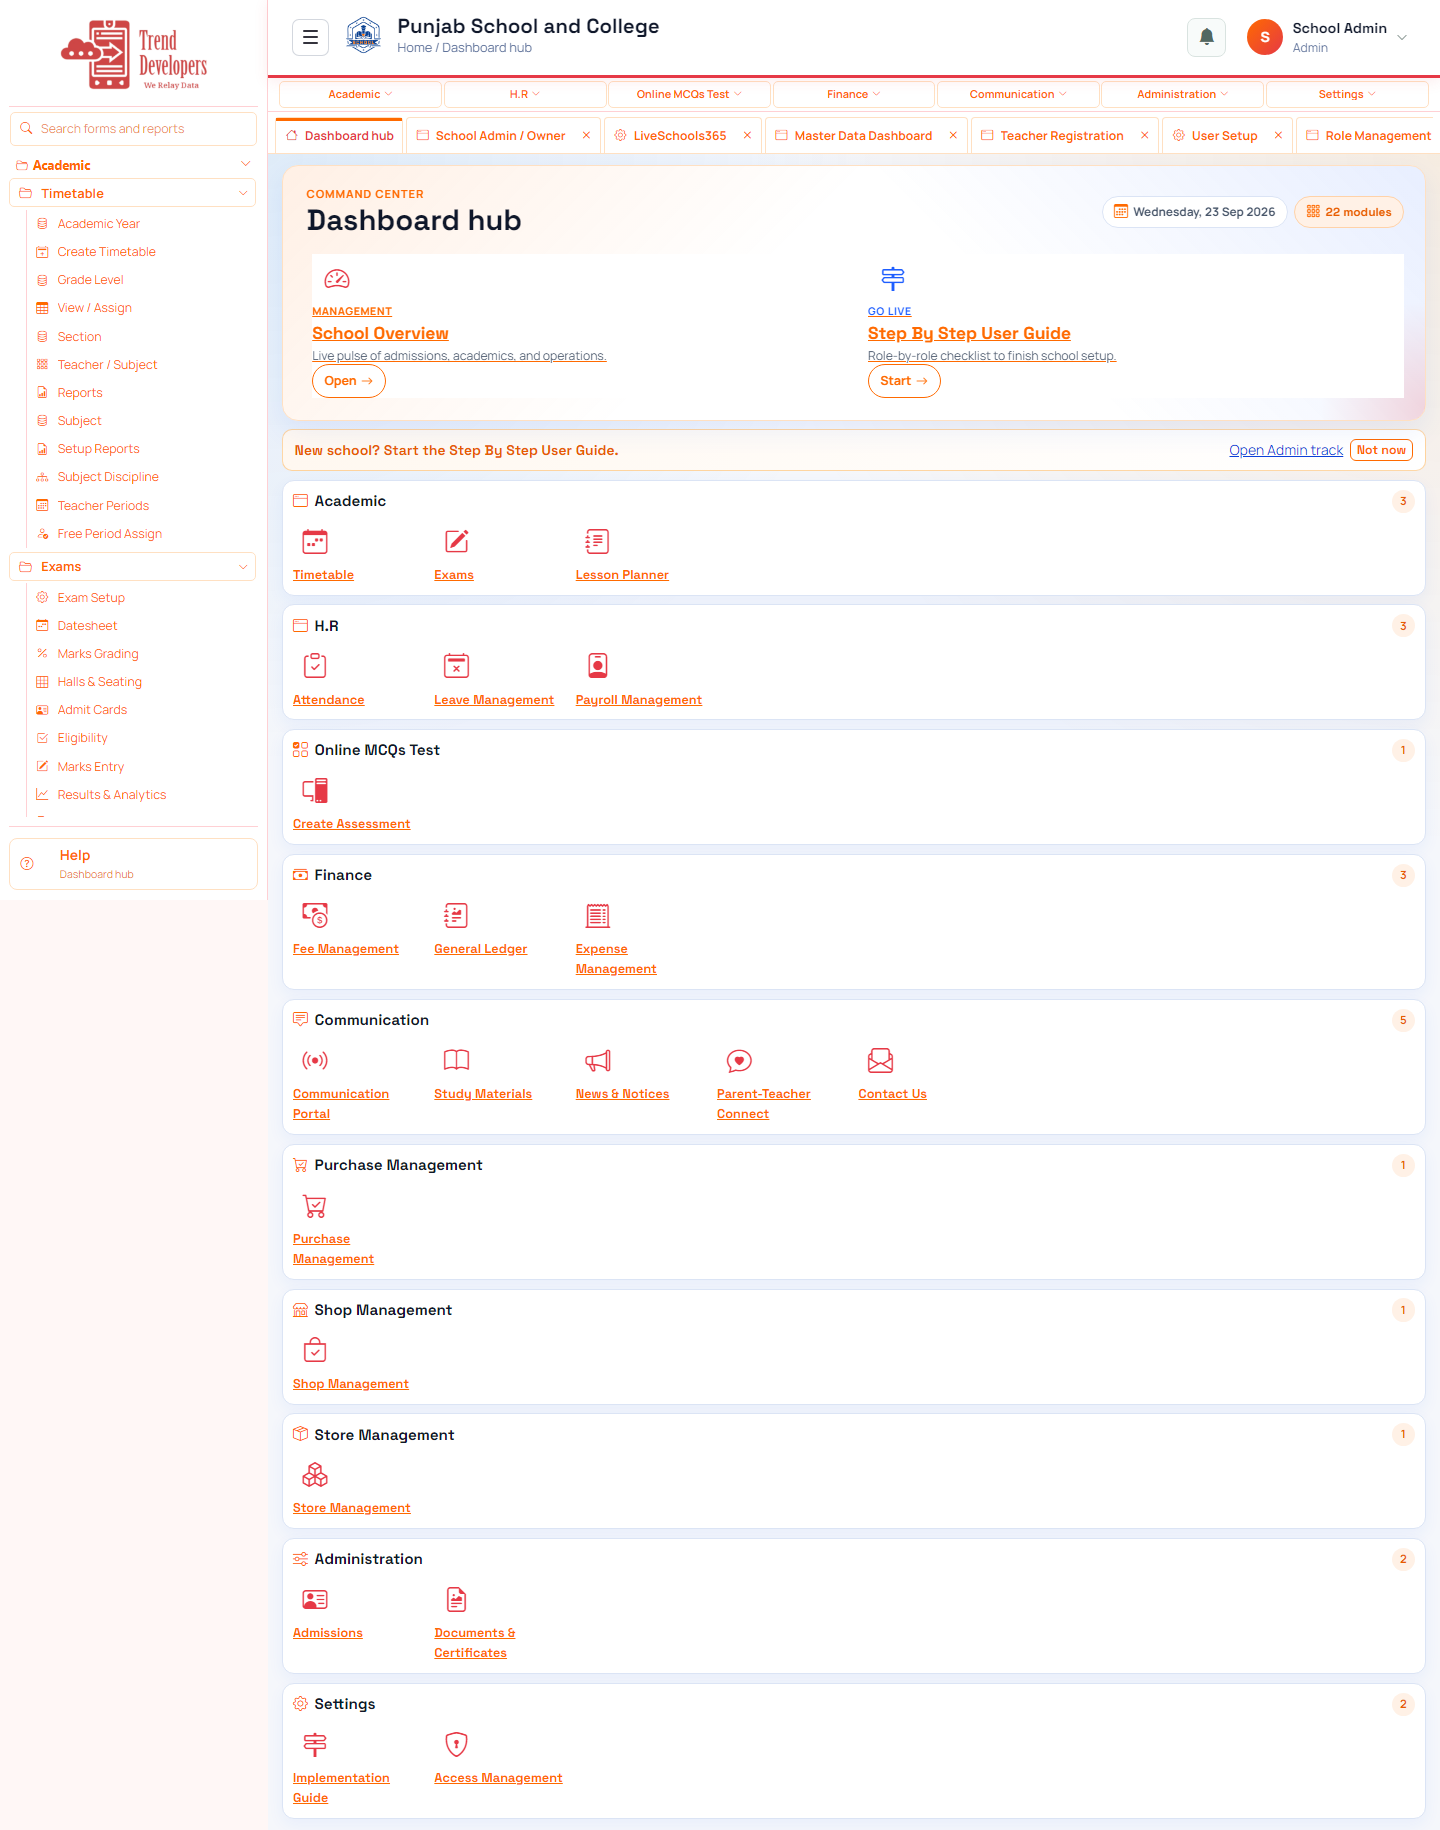
- Complete the School Admin / Owner Implementation Guide track end-to-end (~60 minutes).
- Make the school ready to operate: identity, master data, users, fees, and teaching coverage.
- Use official menu paths instead of informal messaging for auditable school work.
- Know when to Mark done and how to resume from /implement or Trial Journey.
2. Sign in
- Login:
/school-management-software-login - User:
schooladmin@liveschool - Password:
LiveSchool@123 - Guide:
/implement/admin
3–4. Guided workflows
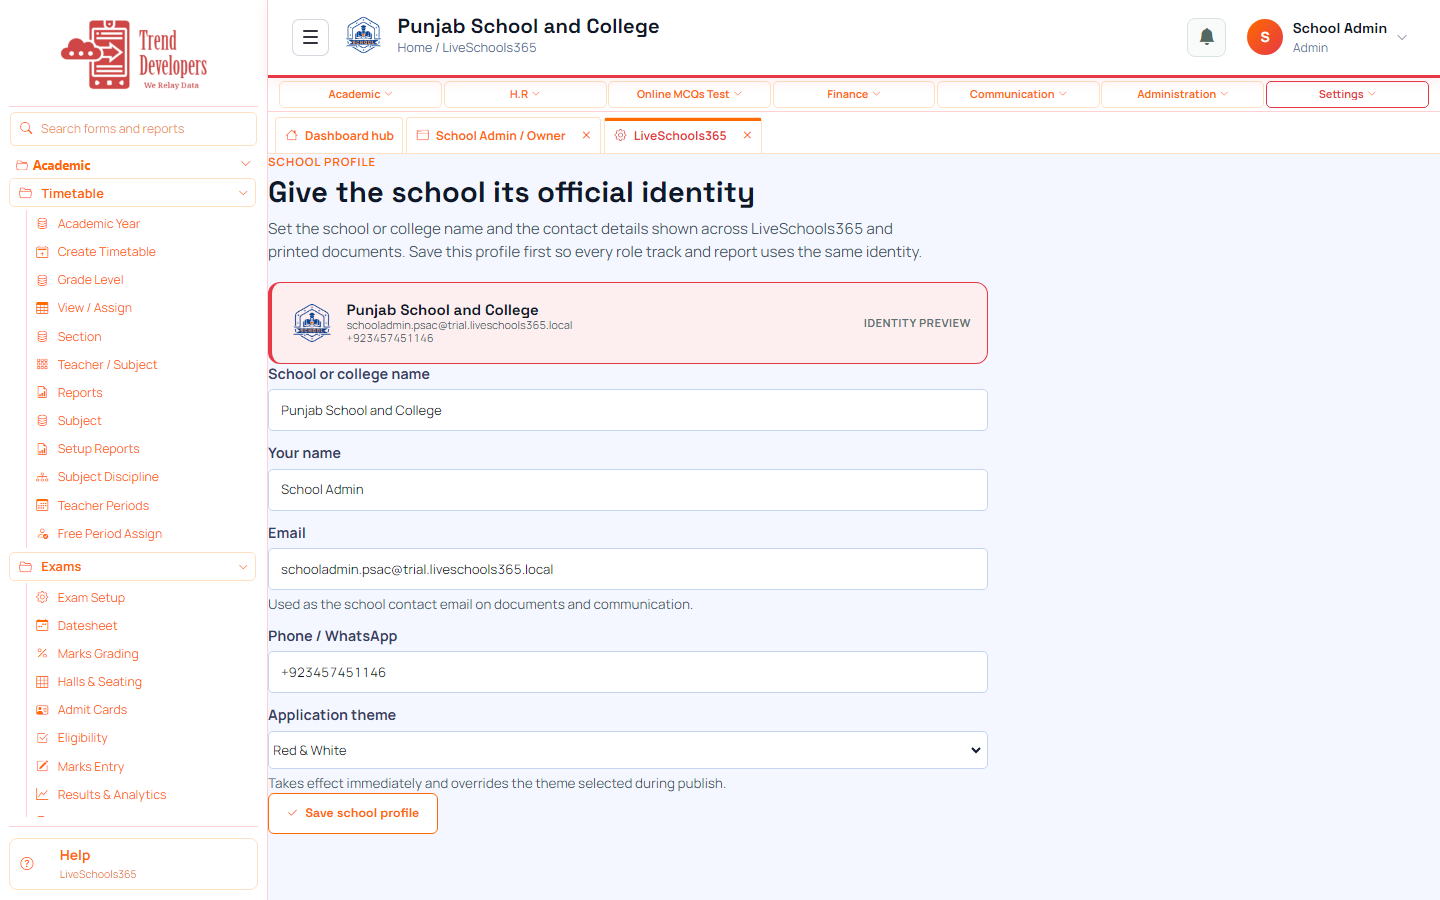
4.1 School name and logo
Main task: Give the school its official identity
Why: Every screen and printed document shows this name and logo.
Menu: Settings → School Profile
Route: /settings/school-profile
How to:
- Open Settings from the top menu.
- Click School Profile in the left menu.
- Enter the official school name.
- Upload the school logo if you have it.
- Save, then return here and Mark done.
Practice:
- Open live form: /settings/school-profile
- Follow menu path: Settings → School Profile
- Practice school name: "Mashal Demo Secondary School"
Expected: After this step, “Give the school its official identity” is true on the live system, and the Implementation Guide step “School name and logo” can be Mark done.
Mistakes:
- If this step is skipped: Every screen and printed document shows this name and logo.
- Using WhatsApp instead of the official form — the audit trail will be missing.
4.2 Campuses and classes
Main task: Build the school structure everything else attaches to
Why: Attendance, fees, timetable, and exams need campus, year, grade, section, and subject first.
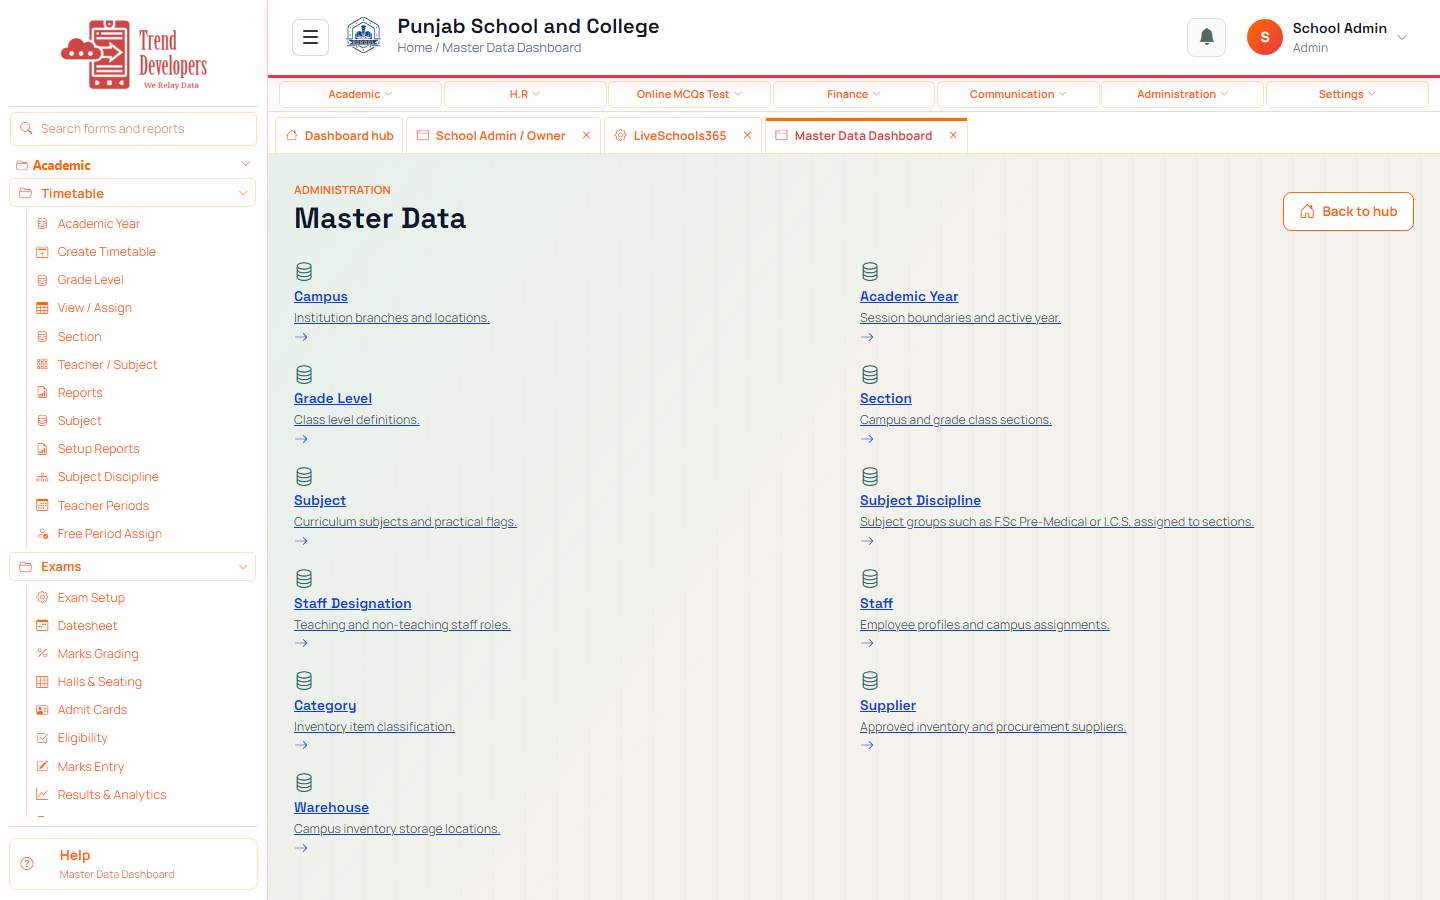
Menu: Administration → Master Data
Route: /master-data
How to:
- Open Master Data from the dashboard hub or left menu.
- Create Campus first.
- Create Academic Year for that campus.
- Create Grade Levels, then Sections under each grade.
- Create Subjects.
- Use Excel upload if you have many rows — download template, fill, upload.
- Return here and Mark done when the structure exists.
Fields:
- Report parameters — Define the authorized setup population and analysis scope.
- Export to Excel — Download the generated result with branding, metadata, parameters, and rows.
- Discipline name / code — Name the subject group used by sections.
- Subjects in discipline — Tick the subjects students in this group must take.
- Active — Allow new section assignments.
Practice:
- Open live form: /master-data
- Follow menu path: Administration → Master Data
- Practice: Campus=Main, Year=2025-26, Grade=G01, Section=A, Subject=English
Expected: After this step, “Build the school structure everything else attaches to” is true on the live system, and the Implementation Guide step “Campuses and classes” can be Mark done.
Mistakes:
- If this step is skipped: Attendance, fees, timetable, and exams need campus, year, grade, section, and subject first.
- Creating sections before campus/year/grade → cascading lists stay empty.
4.3 Register teachers
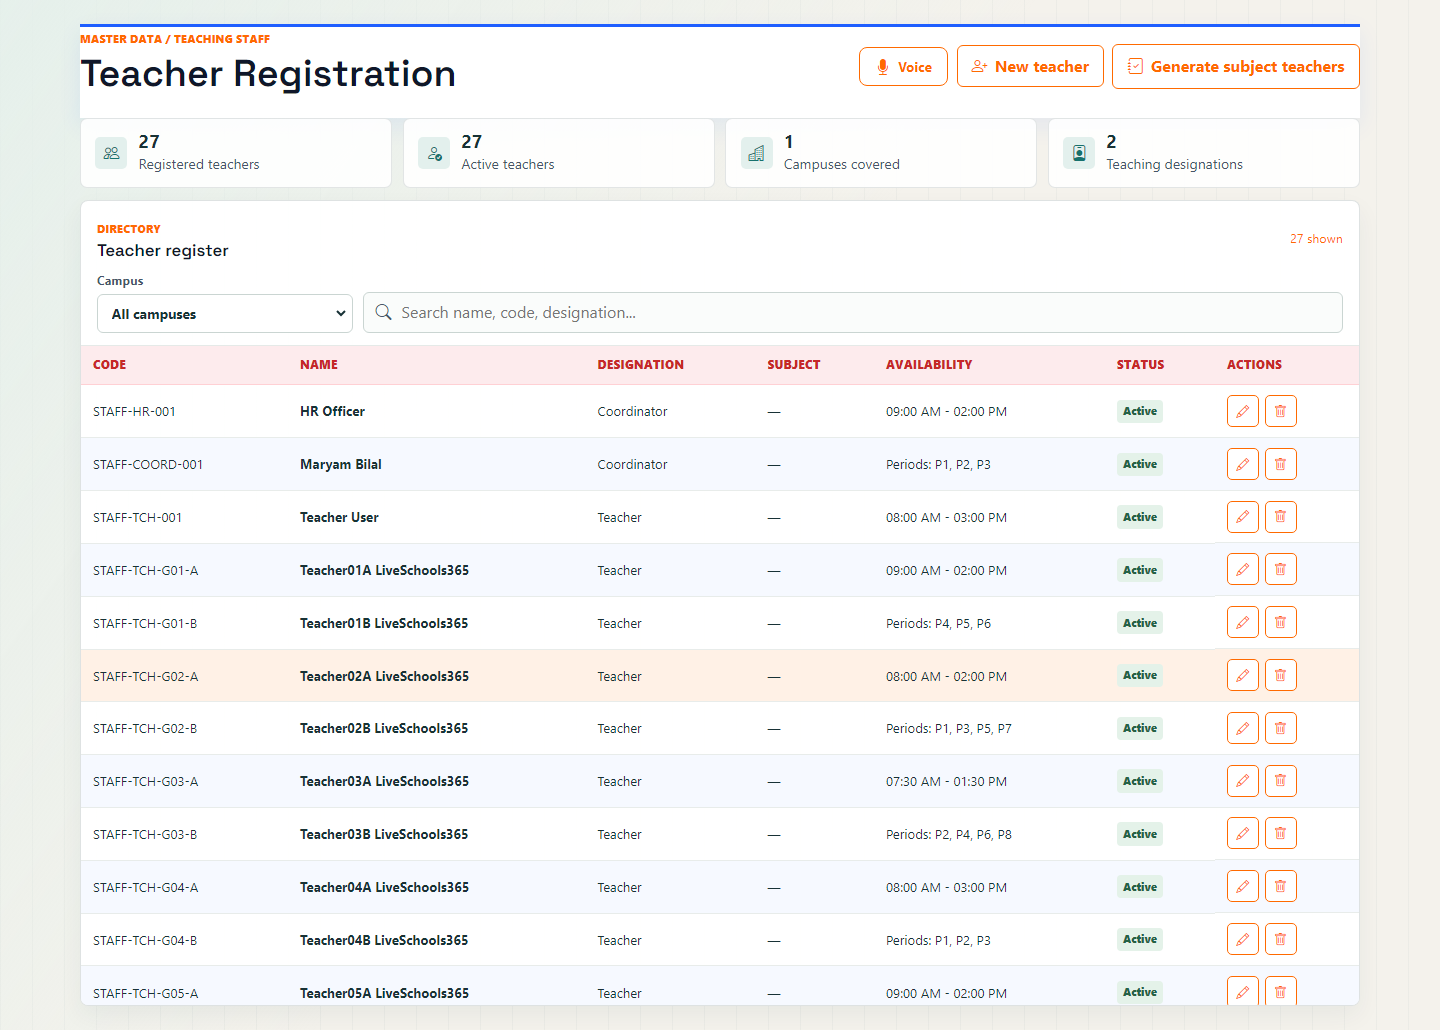
Main task: Add the people who will teach classes
Why: Timetable and attendance need real teacher records before you assign work.
Menu: Administration → Master Data → Teacher Registration
Route: /master-data/teacher-registration
How to:
- Open Teacher Registration.
- Enter staff code, name, and teaching designation.
- Assign campus and set the record Active.
- Save the teacher.
- Return here and Mark done.
Practice:
- Open live form: /master-data/teacher-registration
- Follow menu path: Administration → Master Data → Teacher Registration
- Practice teacher: code=T-101, name=Ayesha Khan, designation=Teacher
Expected: After this step, “Add the people who will teach classes” is true on the live system, and the Implementation Guide step “Register teachers” can be Mark done.
Mistakes:
- If this step is skipped: Timetable and attendance need real teacher records before you assign work.
- Creating sections before campus/year/grade → cascading lists stay empty.
4.4 Create login users
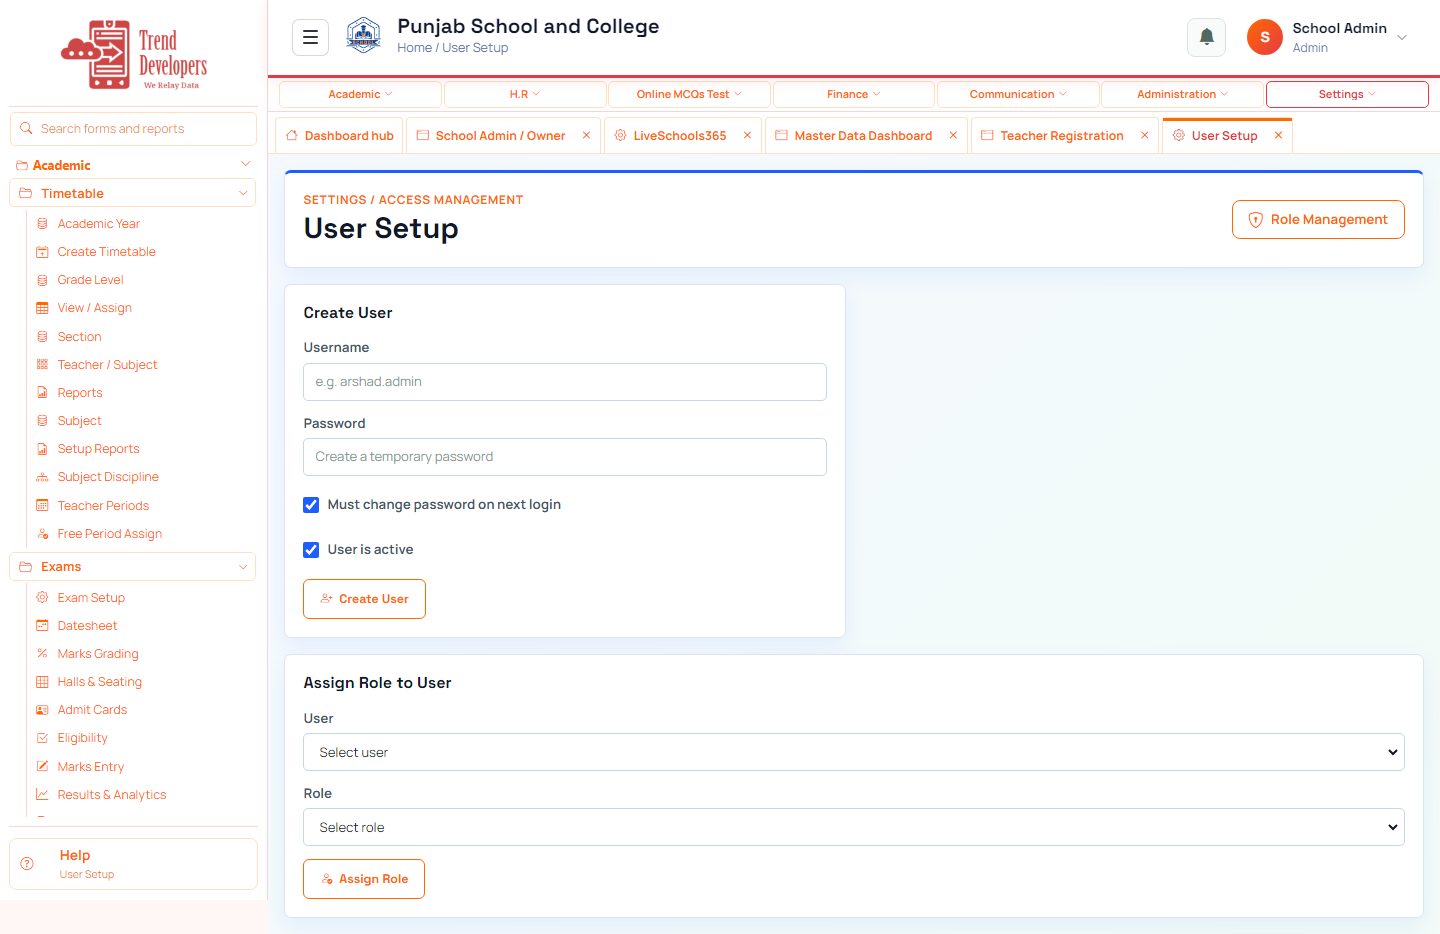
Main task: Give staff a way to sign in
Why: A person record is not enough — each staff member needs a username, password, and role.
Menu: Settings → Access Management → User Setup
Route: /security/identity-setup
How to:
- Open Settings → Access Management → User Setup.
- Create a user with username and temporary password.
- Tick Must change password if this is a temporary password.
- Assign a role (Teacher, Accountant, Principal, …).
- Share the login with the person, then Mark done.
Practice:
- Open live form: /security/identity-setup
- Follow menu path: Settings → Access Management → User Setup
- Practice: create a Teacher role login and verify sign-in works
Expected: After this step, “Give staff a way to sign in” is true on the live system, and the Implementation Guide step “Create login users” can be Mark done.
Mistakes:
- If this step is skipped: A person record is not enough — each staff member needs a username, password, and role.
- Using WhatsApp instead of the official form — the audit trail will be missing.
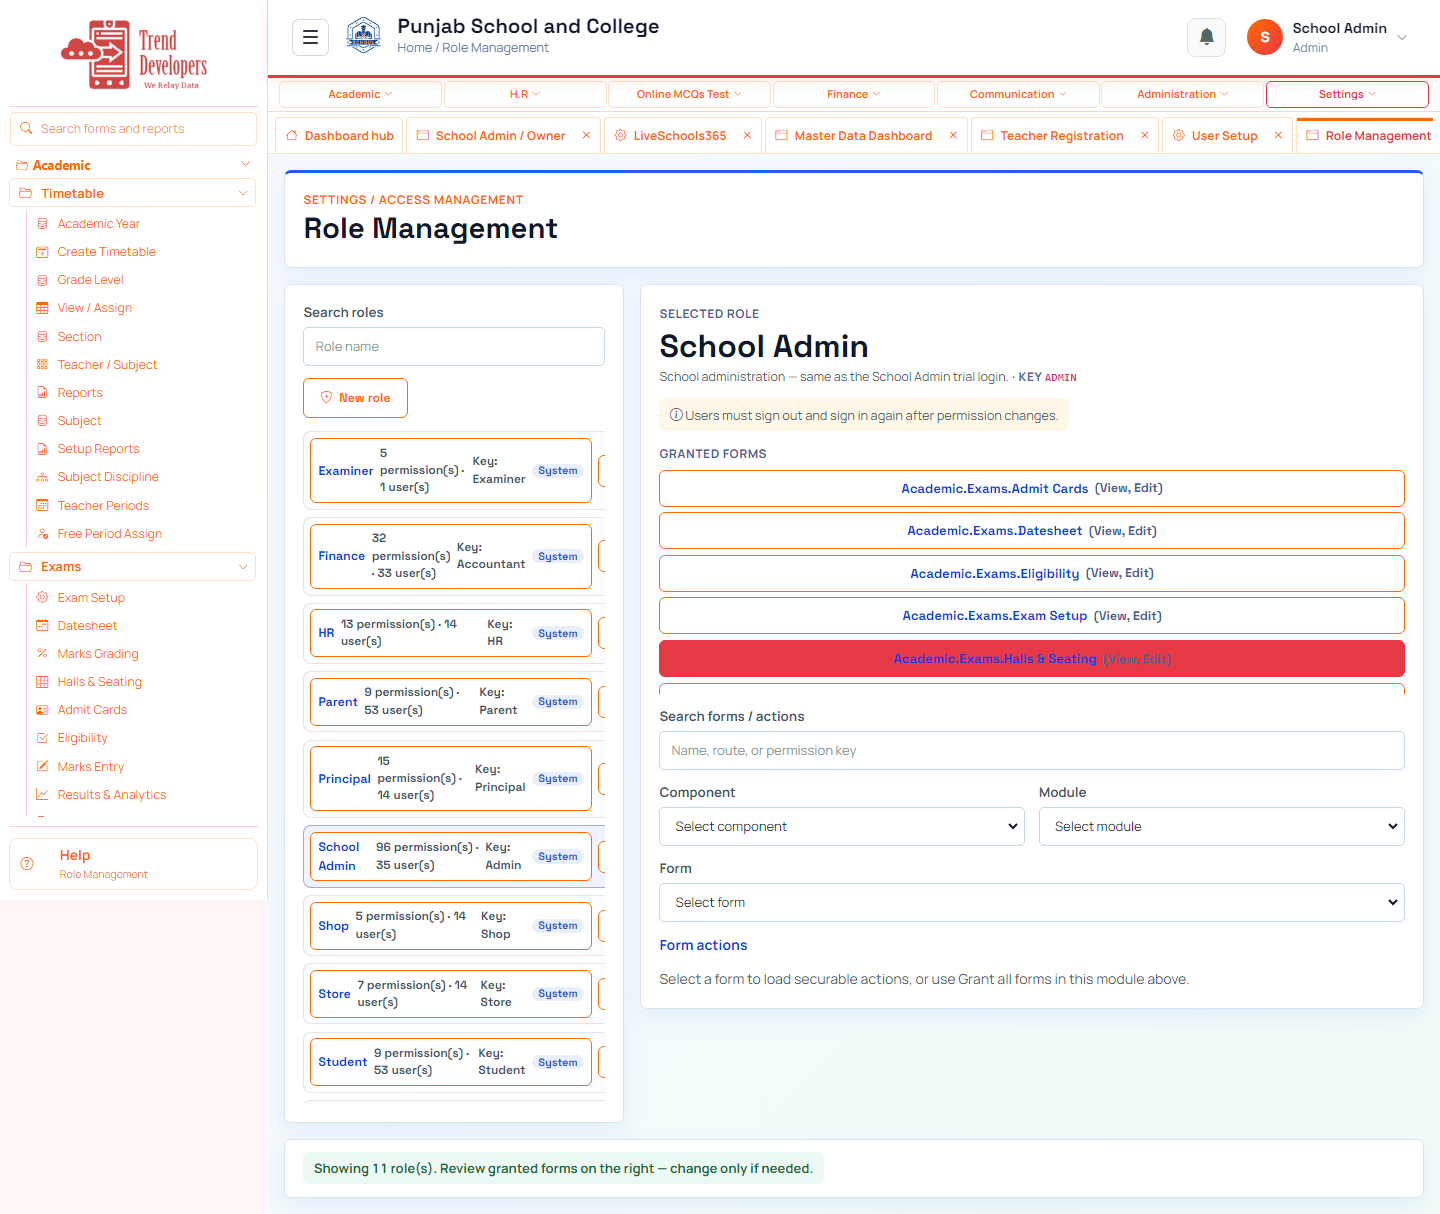
4.5 Who can open which form
Main task: Review access already granted to each role
Why: Trial roles already have form permissions. Confirm them, adjust if needed, then continue.
Menu: Settings → Access Management → Role Management
Route: /security/role-management
How to:
- Open Settings → Access Management → Role Management.
- Select a role (Teacher, Accountant, Principal, …).
- Review the Granted forms list — access is already seeded.
- Change any form actions if you need to, then Save.
- When the access looks right, return here and Mark done.
Practice:
- Open live form: /security/role-management
- Follow menu path: Settings → Access Management → Role Management
- Practice goal: Review access already granted to each role
Expected: After this step, “Review access already granted to each role” is true on the live system, and the Implementation Guide step “Who can open which form” can be Mark done.
Mistakes:
- If this step is skipped: Trial roles already have form permissions. Confirm them, adjust if needed, then continue.
- Using WhatsApp instead of the official form — the audit trail will be missing.
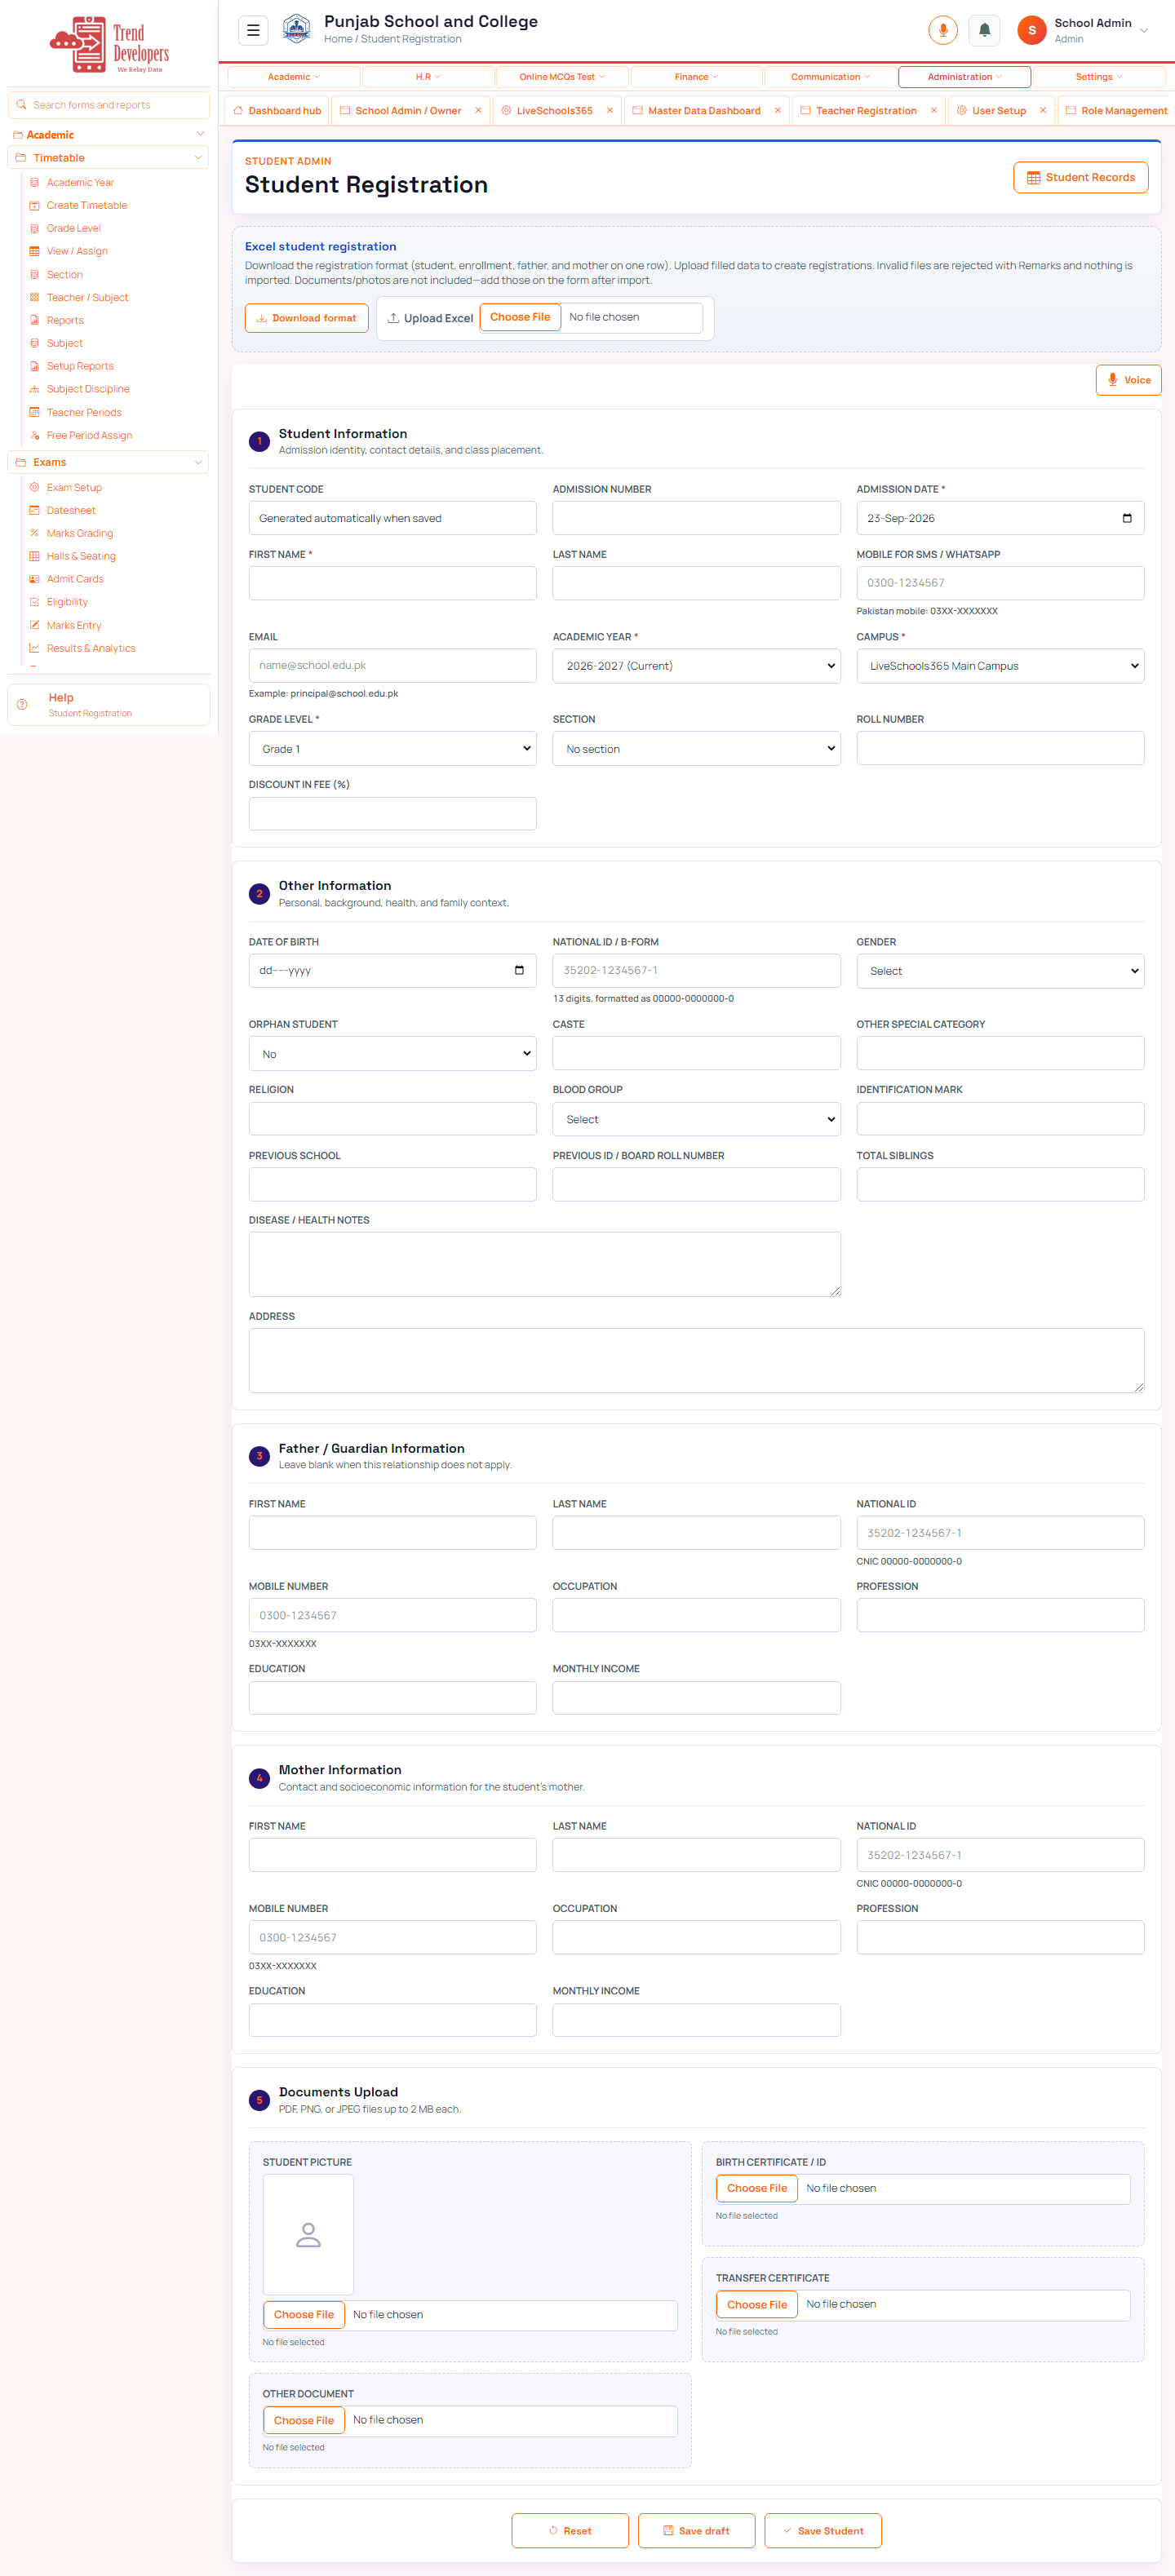
4.6 Register a sample student
Main task: Create one complete learner record
Why: Fees and attendance need at least one enrolled student to practice with.
Menu: Academic → Admissions / Students → Student Registration
Route: /student-admin/onboarding
How to:
- Open Student Registration (onboarding).
- Enter student name and admission date.
- Choose Academic Year, Campus, Grade, and Section.
- Add parent/guardian contact if available.
- Save the student.
- Return here and Mark done.
Fields:
- Student identity and admission — Create the official identity used by academic, fee, communication, and reporting workflows.
- Academic placement — Place the student in the correct active class.
- Personal and health information — Record identity, background, previous school, health notes, and address needed for student care.
- Father / guardian and mother — Create family contacts and relationship context for the student.
- Documents — Attach the student picture, birth certificate or ID, transfer certificate, and other admission evidence.
Practice:
- Open live form: /student-admin/onboarding
- Follow menu path: Academic → Admissions / Students → Student Registration
- Practice goal: Create one complete learner record
Expected: After this step, “Create one complete learner record” is true on the live system, and the Implementation Guide step “Register a sample student” can be Mark done.
Mistakes:
- If this step is skipped: Fees and attendance need at least one enrolled student to practice with.
- Using WhatsApp instead of the official form — the audit trail will be missing.
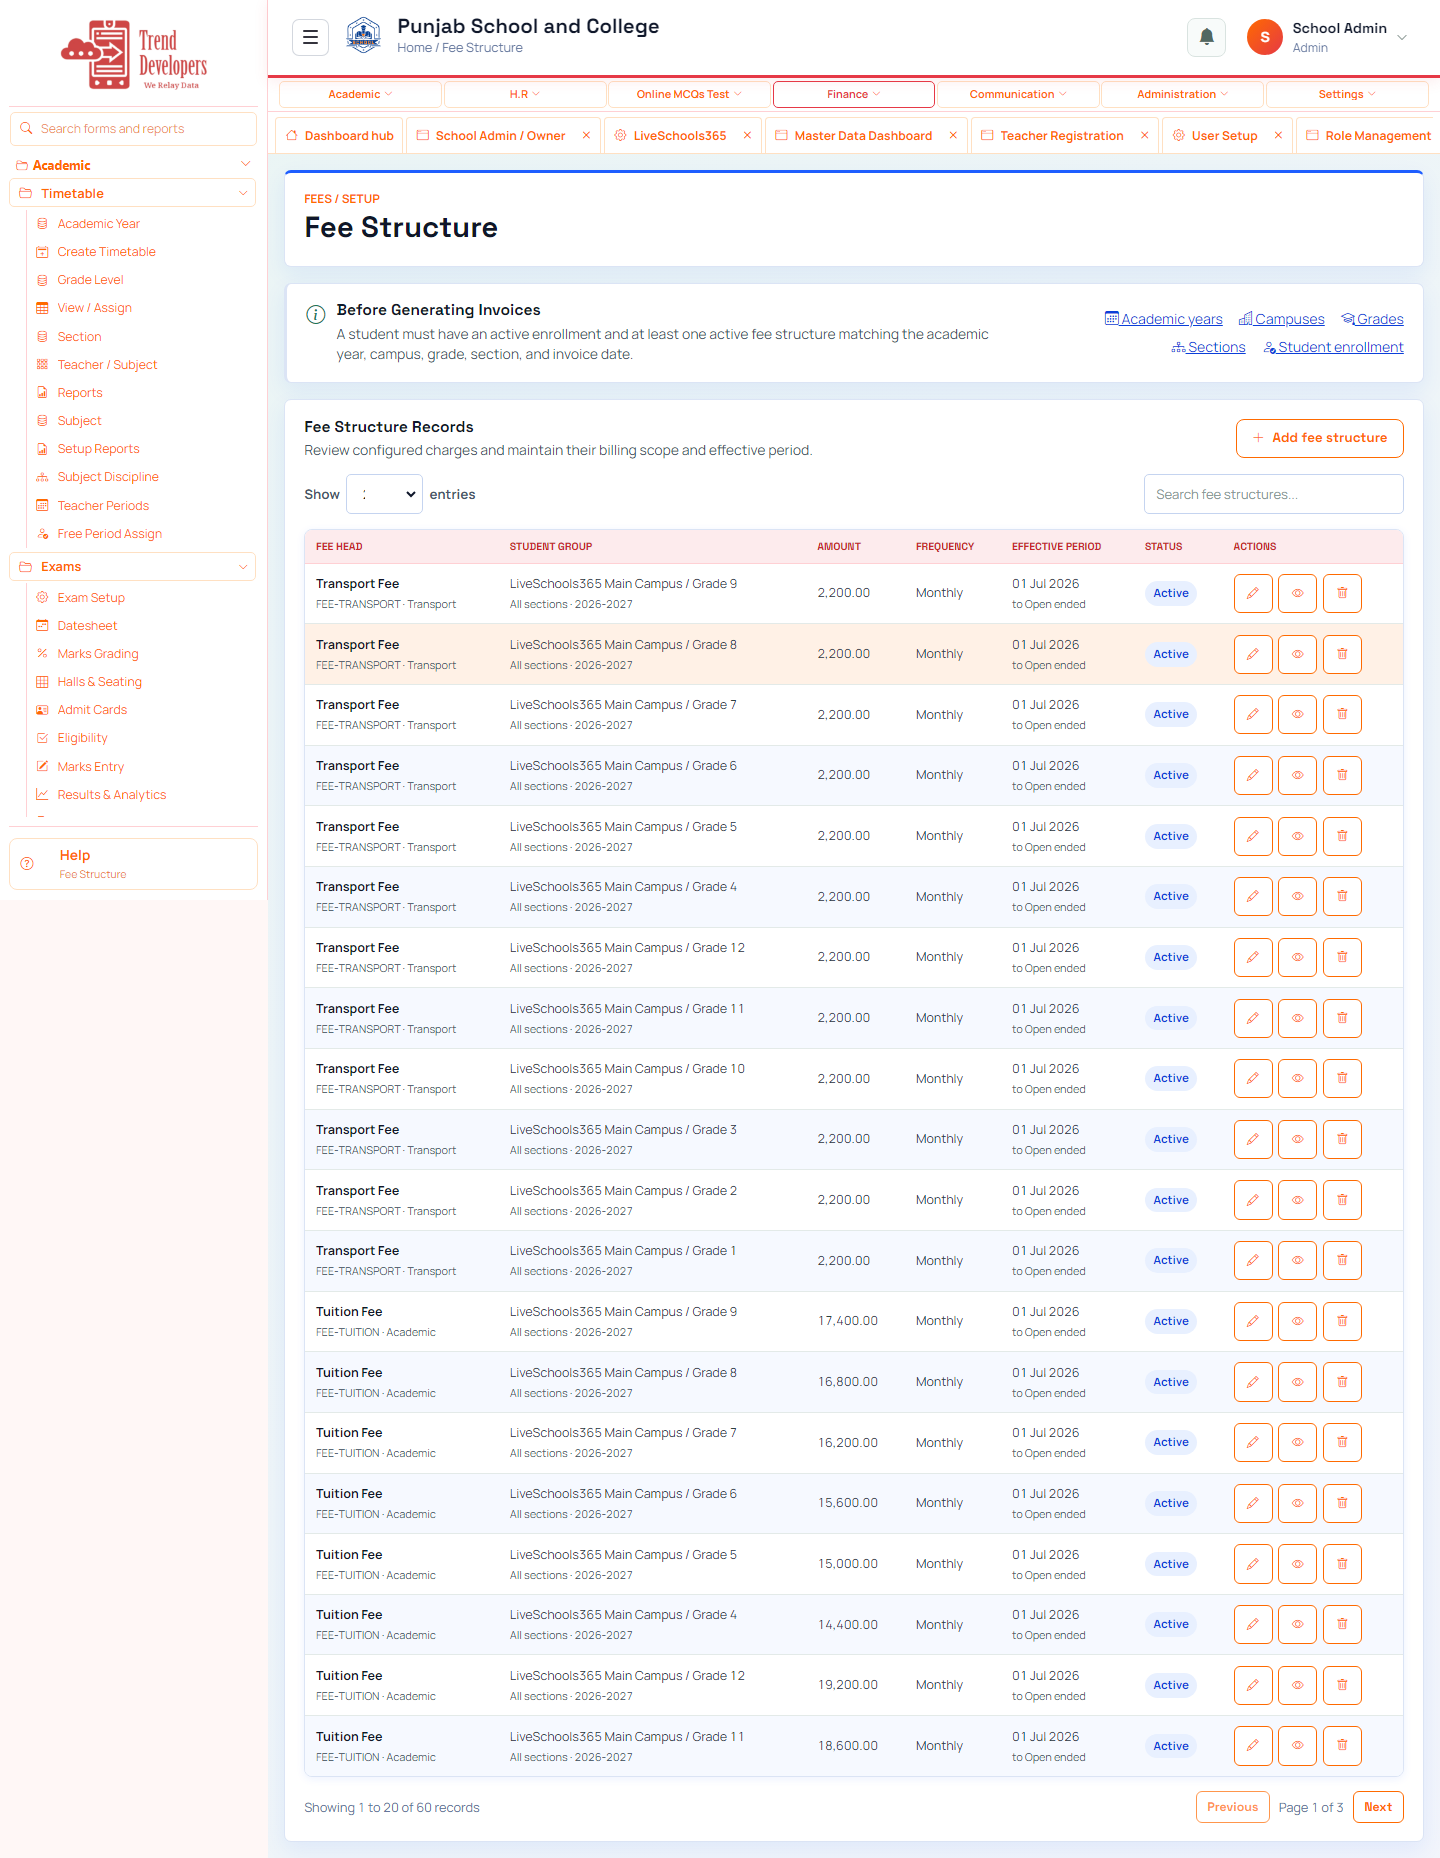
4.7 Fee structure
Main task: Define how students are billed
Why: Invoices cannot generate until fee charges exist for the grades you bill.
Menu: Finance → Fee Management → Fee Structure
Route: /fees/setup
How to:
- Open Finance from the top menu.
- Open Fee Management, then Fee Structure.
- Confirm or create charges for the grades you will bill.
- Save.
- Return here and Mark done.
Fields:
- Fee head — Name the charge category.
- Amount / frequency — Set charge value and recurrence.
- Campus / grade / section — Choose who receives the charge from Master Data grades and sections; students need not be registered yet.
- Active — Allow future billing use.
- Period name — Identify the accounting period.
Practice:
- Open live form: /fees/setup
- Follow menu path: Finance → Fee Management → Fee Structure
- Practice: bill Grade G01 / Section A for the current month; receive a small test payment
Expected: After this step, “Define how students are billed” is true on the live system, and the Implementation Guide step “Fee structure” can be Mark done.
Mistakes:
- If this step is skipped: Invoices cannot generate until fee charges exist for the grades you bill.
- Generating invoices before fee structure exists → empty batch / zero challans.
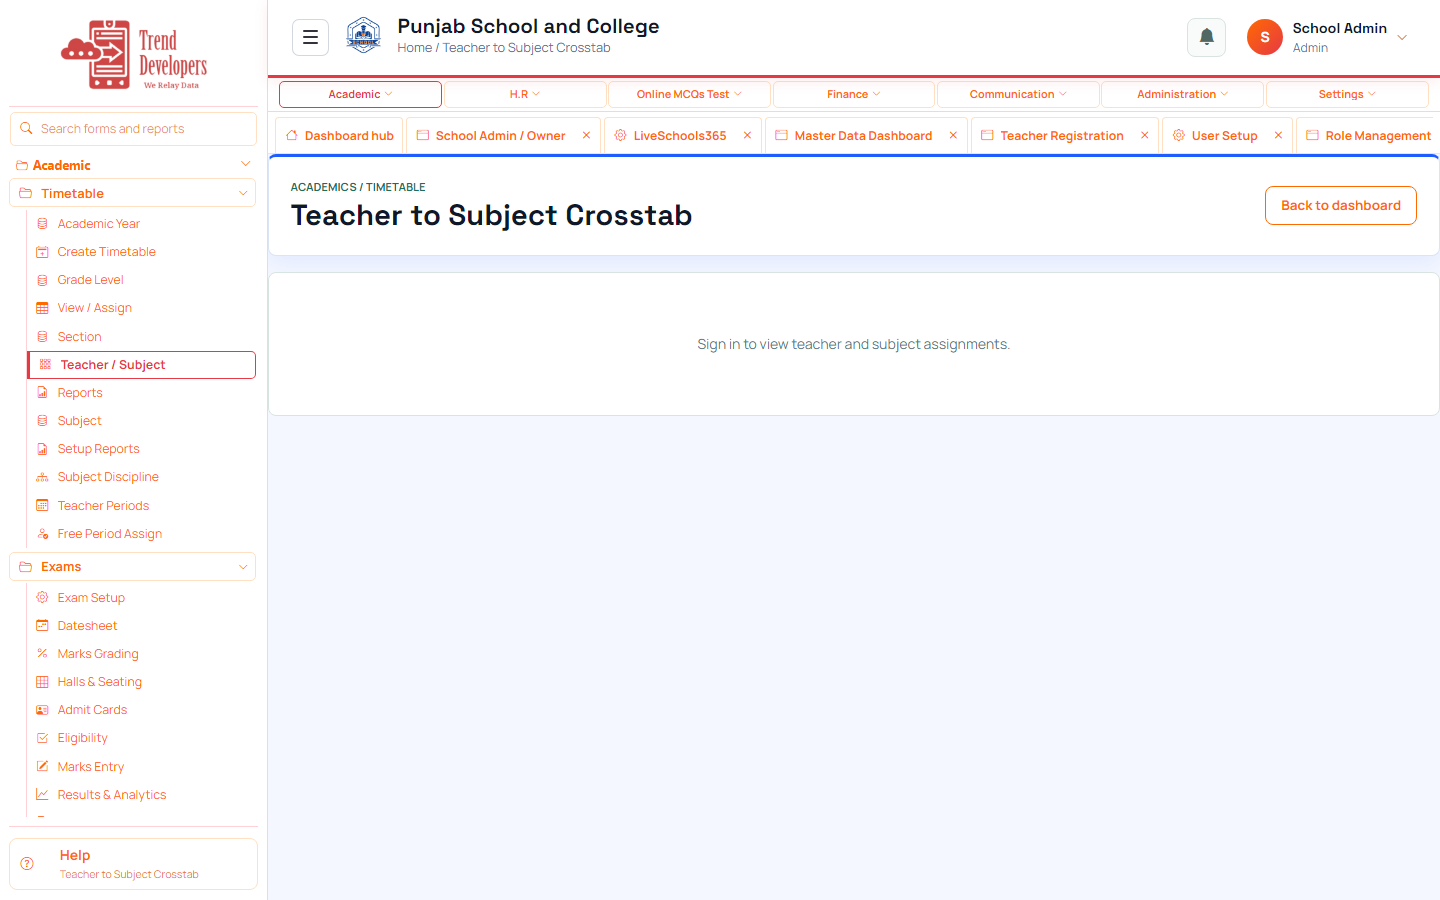
4.8 Teacher to subject coverage
Main task: Decide who teaches which class subject
Why: Exam marks and class schedules depend on this teacher–subject allocation.
Menu: Academic → Timetable → Teacher to Subject
Route: /timetable/teacher-subject-crosstab
How to:
- Open Timetable → Teacher to Subject crosstab.
- Choose Campus and Academic Year.
- Click a cell and assign subjects for that teacher and section.
- Save the allocations.
- Return here and Mark done.
Practice:
- Open live form: /timetable/teacher-subject-crosstab
- Follow menu path: Academic → Timetable → Teacher to Subject
- Practice goal: Decide who teaches which class subject
Expected: After this step, “Decide who teaches which class subject” is true on the live system, and the Implementation Guide step “Teacher to subject coverage” can be Mark done.
Mistakes:
- If this step is skipped: Exam marks and class schedules depend on this teacher–subject allocation.
- Using WhatsApp instead of the official form — the audit trail will be missing.
4.9 You are ready
Main task: Hand daily work to each role
Why: Admin setup is complete when structure, users, and sample data exist.
Menu: Home → Dashboard hub
Route: /app
How to:
- Open the Dashboard hub.
- Ask Accountant to open Implementation → Accountant track.
- Ask Teacher to open Implementation → Teacher track.
- Ask Principal to open Implementation → Principal track.
- Mark done — your Admin track is complete.
Practice:
- Open live form: /app
- Follow menu path: Home → Dashboard hub
- Practice goal: Hand daily work to each role
Expected: After this step, “Hand daily work to each role” is true on the live system, and the Implementation Guide step “You are ready” can be Mark done.
Mistakes:
- If this step is skipped: Admin setup is complete when structure, users, and sample data exist.
- Using WhatsApp instead of the official form — the audit trail will be missing.
5. Capstone checklist
- □ School name and logo
- □ Campuses and classes
- □ Register teachers
- □ Create login users
- □ Who can open which form
- □ Register a sample student
- □ Fee structure
- □ Teacher to subject coverage
- □ You are ready
6. Knowledge check
Q: What is the first main task on the School Admin / Owner track?
A: Give the school its official identity
Q: Which menu path opens “School name and logo”?
A: Settings → School Profile
Q: Why does “Campuses and classes” matter?
A: Attendance, fees, timetable, and exams need campus, year, grade, section, and subject first.
Q: What happens if you finish a live form but do not Mark done?
A: Later Implementation Guide steps stay locked / progress is incomplete.
Q: Demo username for this kit?
A: schooladmin@liveschool
7. Video